The code for the ESP32 using the DHT11, DHT20, or DHT22 is identical to the Arduino example in the previous chapter. You just need to modify the connected OUT pin or the SDA and SCL pins. Also, remember to change the VCC to 3.3V, as the ESP32’s GPIO operates at a logical level of 3.3V.
In this chapter, we will use the Arduino Cloud Editor to edit and upload code to the ESP32 board, without relying on the desktop version of the Arduino IDE.
Let’s workthrough the steps to edit and upload the code using Arduino Cloud.
Go to the Arduino Cloud website and create an account (or log in if you already have one).
Click on Cloud, then select Sketches from the left menu.


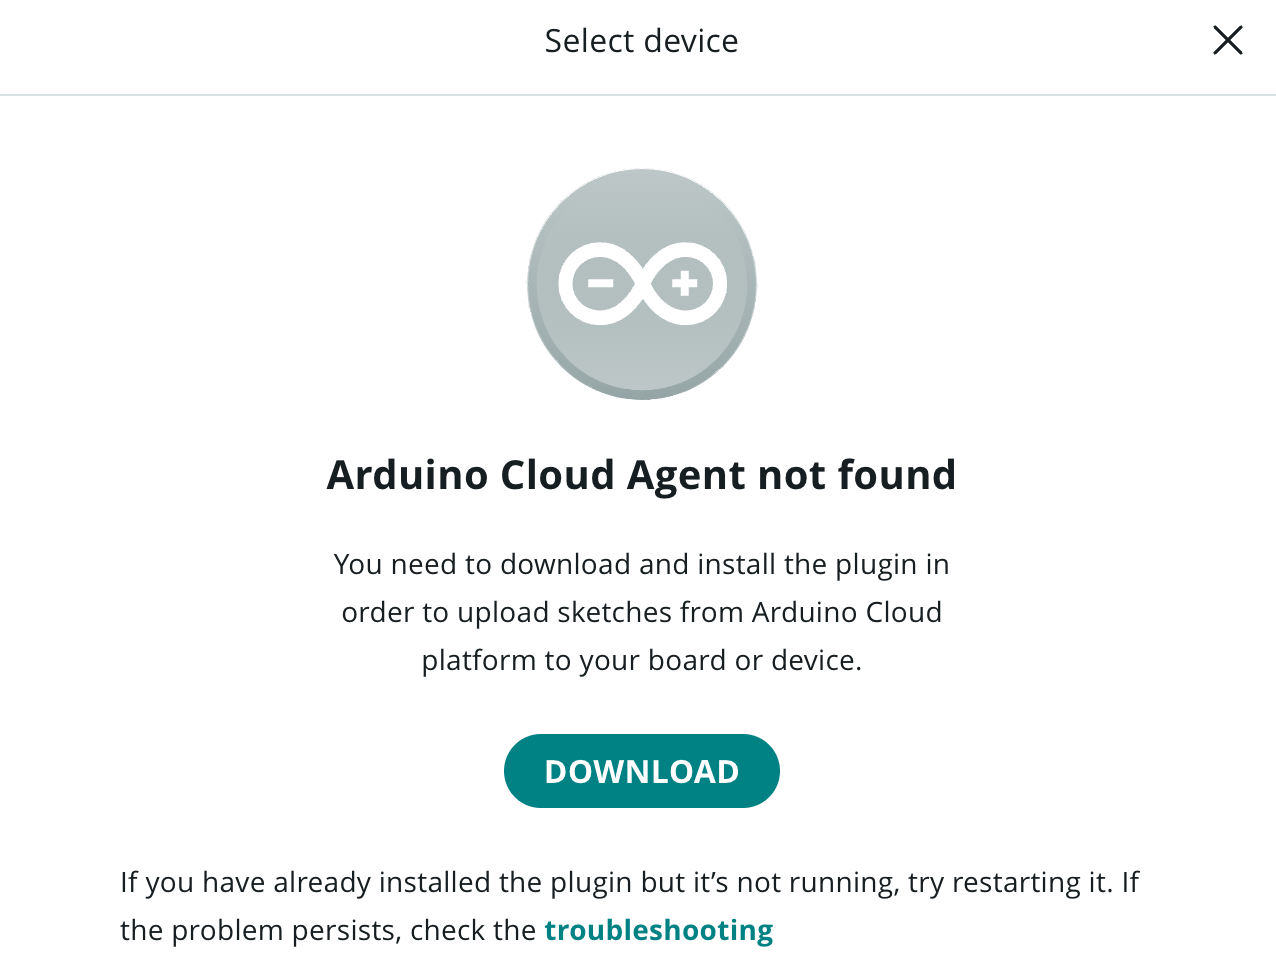
Create a New Sketch and click on Select Device. If this is your first time, you’ll need to install the Arduino Cloud Agent. Or you can download and install from https://cloud.arduino.cc/download-agent


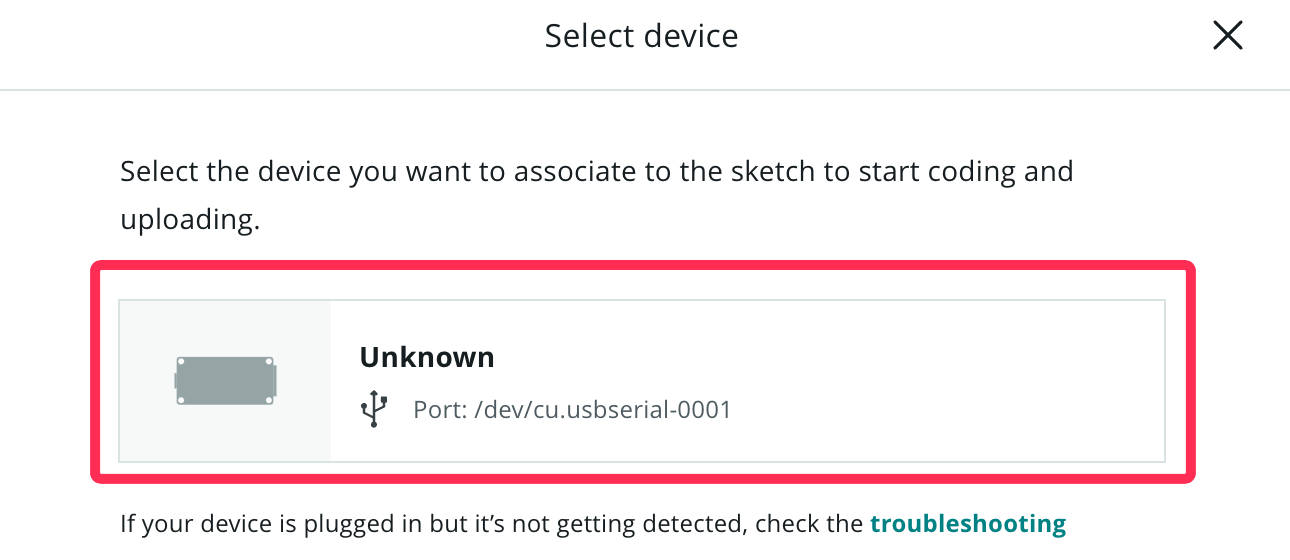
After installing the Arduino Cloud Agent and connecting the ESP32 to your PC, you should see the serial port of the ESP32 appear in the cloud.
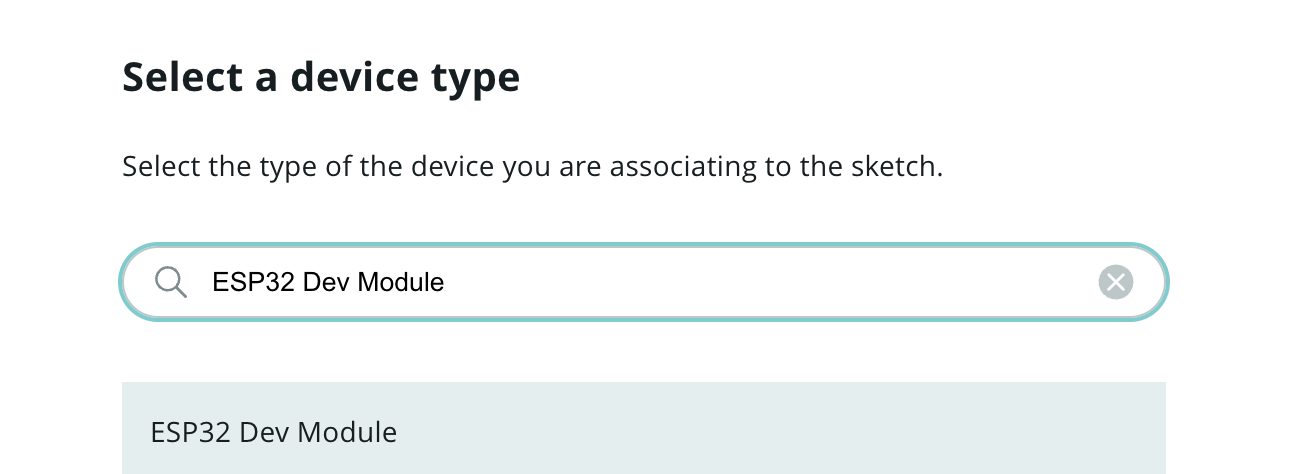
Double-click the Unknown board and search for ESP32 Dev Module.
Let’s install the DHTesp library by clicking the library icon on the left-hand side. Then, search for and include the DHT sensor library for ESPx.
![[Pasted image 20250210095611.png]]

Paste the following code into the Arduino Cloud Editor, connect the DHT22 sensor to the ESP32’s GPIO 23, and upload the code.
| DHT22 | ESP32 |
|---|---|
| + | 3.3V |
| OUT | GPIO 23 |
| – | GND |
#include <DHTesp.h>

DHTesp dht;

const int DHT_PIN = 23; // Pin where DHT22 is connected
const DHTesp::DHT_MODEL_t DHT_MODEL = DHTesp::DHT22; //DHT22
const int FREQUENCY = 2000; // Update every 2 seconds

void setup() {
    Serial.begin(115200);
    dht.setup(DHT_PIN, DHT_MODEL); // Initialize the DHT11 sensor
}

void loop() {
    float temperature = dht.getTemperature();
    float humidity = dht.getHumidity();

    if (isnan(temperature) || isnan(humidity)) {
        Serial.println("Failed to read from DHT sensor!");
        return;
    }

    Serial.print("Temperature: ");
    Serial.print(temperature);
    Serial.print(" C\t");

    Serial.print("Humidity: ");
    Serial.print(humidity);
    Serial.println(" %");

    delay(FREQUENCY); //update the reading every 2 seconds
}
Congratulations! You have successfully uploaded the code to the ESP32 using Arduino Cloud. Well done!
